Compare Files with Git Diff Tool
Comparing files under your version control system is one of the most common tasks in programming. This article describes techniques that are available in git. It helps you setup git diff tool and shows you how to use it to perform some basic comparisons of your changes to a current base and also few more advanced comparisons between specific commits.
Diff
Git already comes with the tool for file comparison. It is text based and easy to use with files with few line changes.
Changing Colors
If you use git on Windows especially with Powershell and posh-git extensions you soon realize that some colors in the output are very hard to read. The dark red used with git status and displayed changes doesn’t work very well with the blue background.
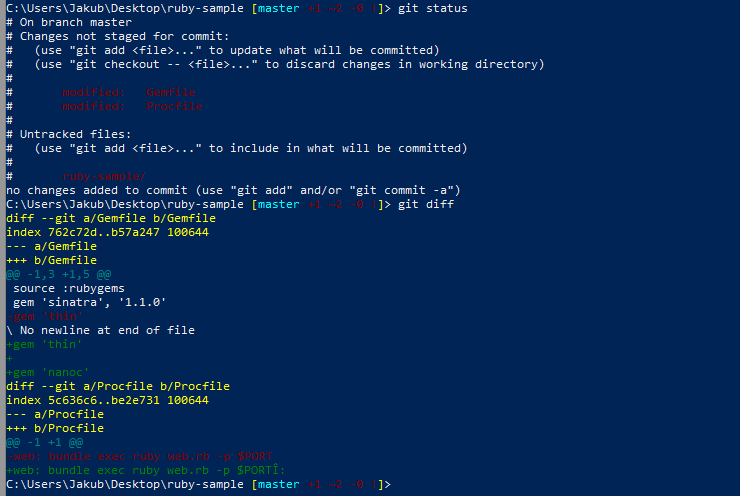
For changing git global configuration of modified and untracked files you need to run these commands. Let’s change the color from dark red to cyan and also modify the colors for changes to more shiny ones.
git config --global color.status.changed "cyan normal bold"
git config --global color.status.untracked "cyan normal bold"
git config --global color.diff.old "red normal bold"
git config --global color.diff.new "green normal bold"
Posh-git is a great tool but the information about modified, untracked and removed files aren’t readable. We’ll change it to much better colors. You have to edit your Powershell profile that is located in your documents folder and you can run $profile to see where exactly it is. Add the following lines to the end of the file and it changes the output from dark red to yellow.
$global:GitPromptSettings.WorkingForegroundColor = [ConsoleColor]::Yellow
$global:GitPromptSettings.UntrackedForegroundColor = [ConsoleColor]::Yellow
Now the output in the Powershell window is much more readable. Take a look at the screenshot and compare it with the previous one.
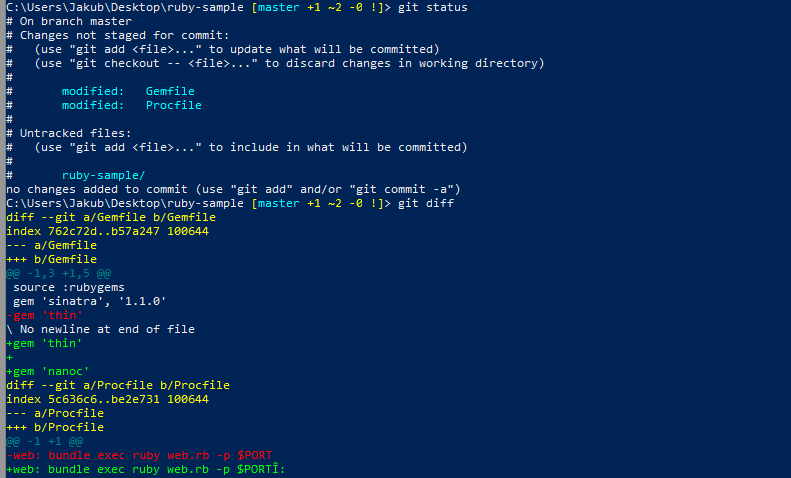
This looks much better than the previous one, don’t you think?
Usage
The most simple usage is to run the command without any parameters.
git diff
It displays all the differences in all your modified files from previously committed work. Old lines are prefixed with the - sign and the new lines with the + sign. There is many more information in the output and I recommend to take a look at stackoverflow for their representation. Just be aware that some of them are not available in the msysgit implementation on Windows.
For displaying the difference in just one file you have to add the file relative location and the file name.
git diff location\filename
Difftool
If you are not satisfied with the simple text diff you need to use a custom tool. For this purpose git provides a command difftool. It allows you to register comparison tool of your choice and to integrate it with git.
Setup
The tool of my choice is p4merge. It is a free, fast and it is capable of performing the most challenging merging and comparing tasks.
There is a lot of different tools you can use and each setup would be a little different. Next steps show you how to setup p4merge as git difftool.
git config --global diff.tool p4merge
git config --global difftool.p4merge.cmd 'p4merge.exe $LOCAL $REMOTE'
git config --global difftool.prompt false
P4merge must be added to your system path. Otherwise you have to provide the full path to the exe file in the difftool.p4merge.cmd line.
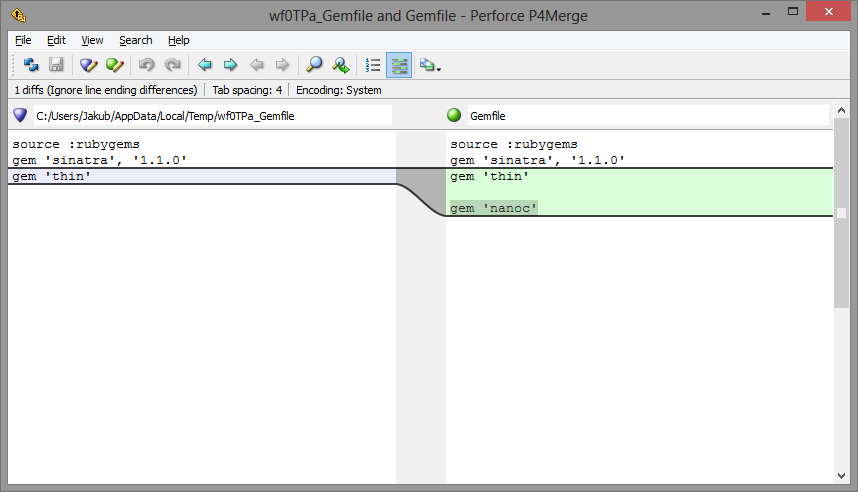
That’s it. From now on p4merge is ready to compare your files. Let’s try it with comparing the working file against the revision in repository. The usage is similar to the git diff from above.
# Starts git difftool for all modified files
git difftool

# Compare only specific file
git difftool location\filename
The first command runs the difftool for all modified files and the second one compares only the specified file.
Advanced Usage
The first thing we want to do is to compare file against specific revision. You can list file revisions with the git log command.
git log filename
From the output you can copy the commit identifier and run the difftool with the path to the version you want to compare with. Just like this.
git difftool 8d53363981a35c07f2bee7cae71f8e8bd95be625 -- filename
You can also compare between two different commits with the following syntax.
# git difftool [start commit]..[end commit] filename
git difftool 6cde26245763dd43f9505c7578a1f7be44b7fad1..8d53363981a35c07f2bee7cae71f8e8bd95be625 filename
You can specify the path of the revision to the branch, relatively to the number of history commits and in more other ways you can ever dream about. Also don’t forget that you can use graphical tools for displaying the history of the file like gitk and others.
Conclusion
Your git should be set up to use diff tool p4merge. With the changed colors you receive much better experience from your command line output.
After reading this article comparison of two different files and looking for changes between different revisions and branches should be no mystery for you. If you have any suggestions to make this experience even more pleasant, please leave a comment.